
Just a quick blog about hooking up to water at a campground. When we first started this journey I wasn’t sure how all these systems worked together so I looked around on the internet and found a few videos but had to piece some of the information together myself. I hope this helps.
When we purchased our camper it came with most of the stuff we needed, but not everything. To complete our water systems we added:
- a pressure regulator
- an in line water filter
- two strain reliefs
- a roll of Teflon, or Plumbers Tape
When you read your owners manual, there will be a section that talks about what water pressure the pipes in the camper are designed to take. Believe it or not, the pressure at every campground is a little different and sometimes it’s actually high enough to damage your camper. You will never plug a 30 Amp camper into a 50 Amp electrical source. So don’t hook up to water without making sure you have taken steps to limit the pressure your trailers pipes will see. That said, make sure nothing leaks.
First and foremost, wash your hands! I know, I know, we are hooking up water – we can’t wash our hands yet. If you are like me you just got done setting the trailer and touching tires, chocks, braces, grease, who knows what off the outside of the trailer and tow vehicle. Cleaning and sanitizing your hands before you hook up the water system you might be drinking out of is a must. Now a days, with Covid-19 in the world, I know you are in arms reach of a bottle of hand sanitizer or a cleaning wipe. Please make sure your hands are clean now. I’m not planning on writing the blog about how to deal with waterborne pathogens when camping.
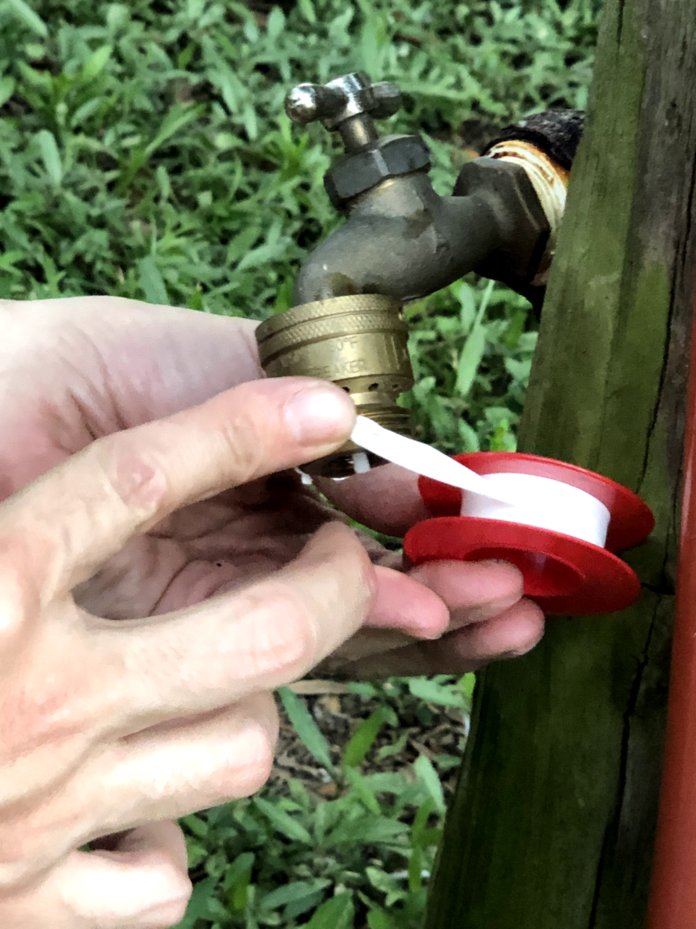
So with clean hands, locate your water source and the aforementioned Teflon tape.
Start with two wraps of Teflon tape around the threads of the water spigot or outflow you are going to connect up to. If you are looking into the end of the pipe that’s two wraps clockwise. This will help the tape stay on the threads as you tighten on the next component. Teflon also seals the threads against leaks while making it easier to disconnect everything when you get ready to leave. Don’t worry if you get it backwards. When that happens, and it still happens to me on occasion, the tape will unwind itself as you try to make your first connection. Speaking of which, the first item I connect is a pressure regulator and surge protector (sound familiar?)

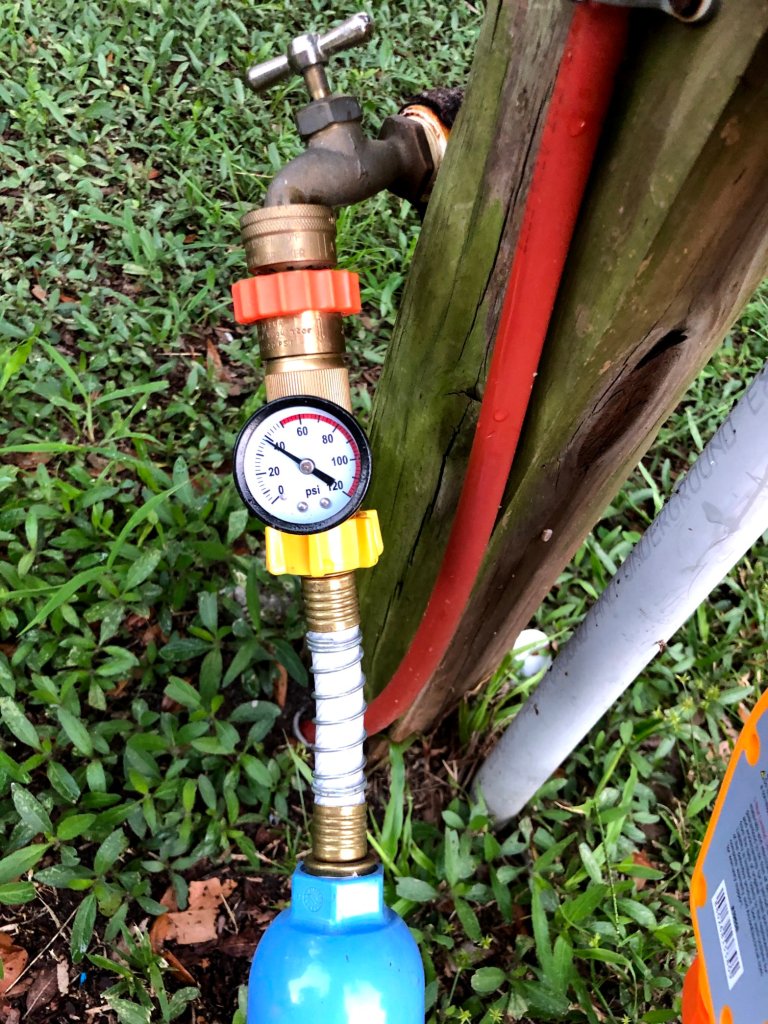
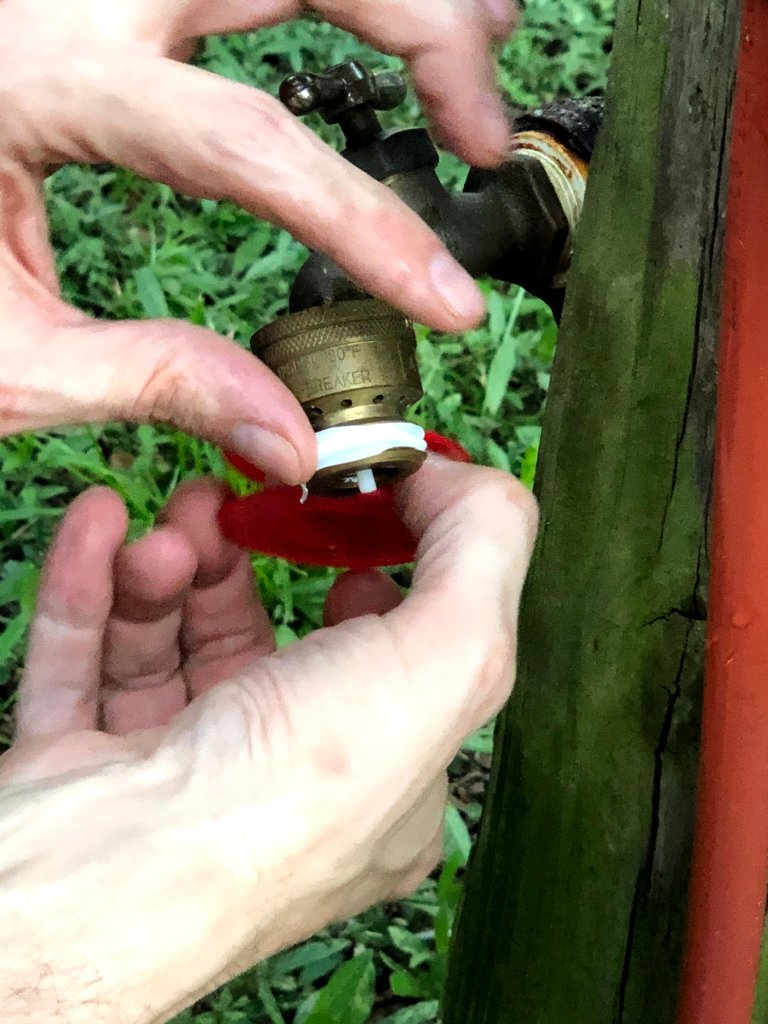
This pressure regulator is made of machined brass and has a handy pressure gauge built in so I know what the pipes in the trailer are dealing with. Then I put two wraps of Teflon tape on the other end of the regulator and add a strain relief, the short section of white hose with the spring wrapped around it. Have your feet ever gotten tripped up buy hoses or cables? Ever ripped a cord out of the wall? I really don’t want to do that with my water system and the trailer so I add these in line in places. Think of it as cheap insurance.
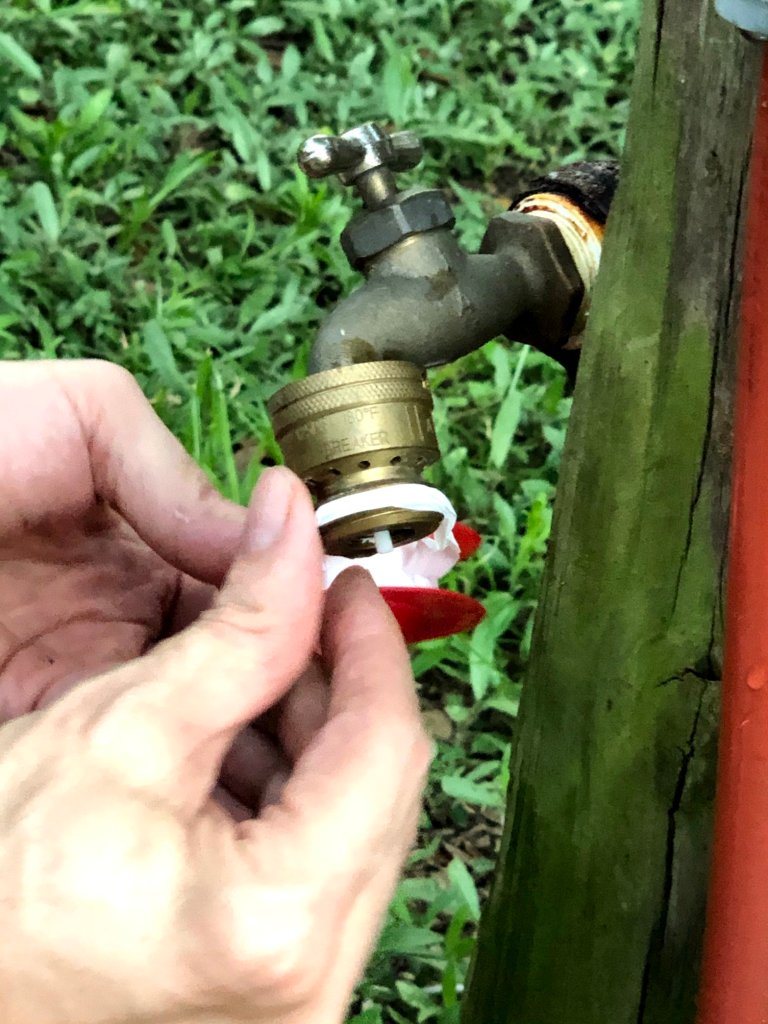
Next the strain relief gets two wraps of ….Teflon tape. (Are you seeing a pattern?) then comes the inline water filter. Some trailers come with an under sink filter or other water filter system, ours did not. Filtered water is a must, especially in Florida.

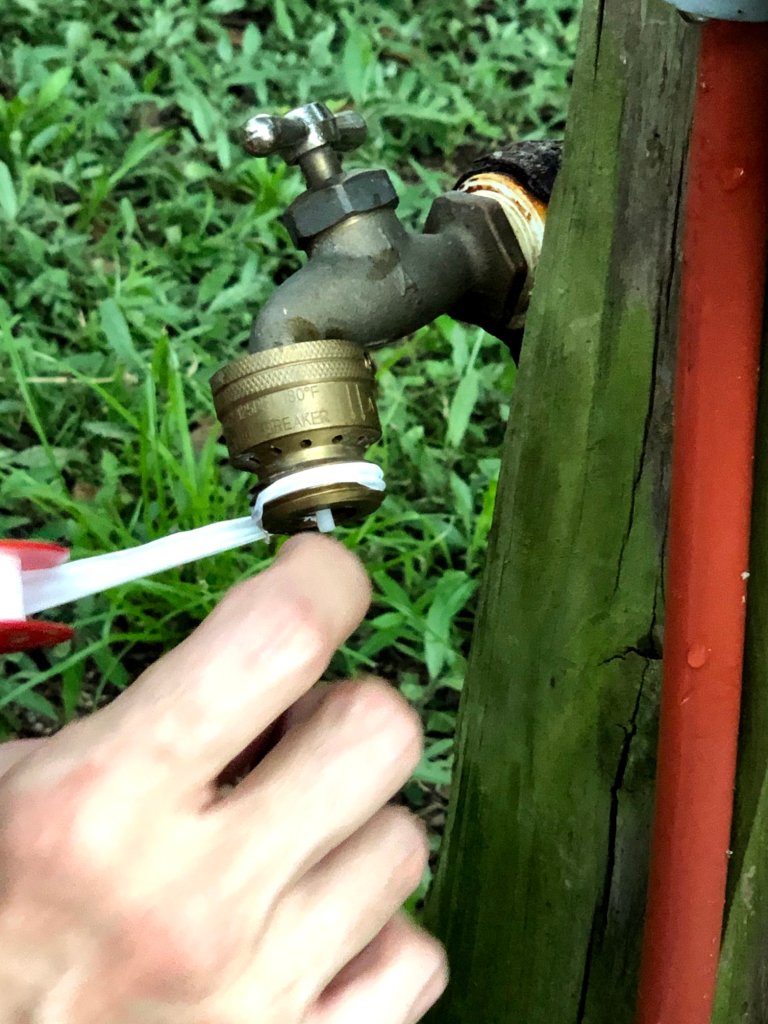
On the bottom of the water filter there is another set of thread that get two wraps of Teflon tape. Connect your fresh water hose to the bottom water filter. I then like to neaten everything up a bit. Tuck the extra coils of hose under the trailer to protect them from UV rays, falling items, my feet and Godzilla (its 2020 , its not over yet and you never know.) In southern states I like to run the hose under the trailer in the shade to keep our water cooler.
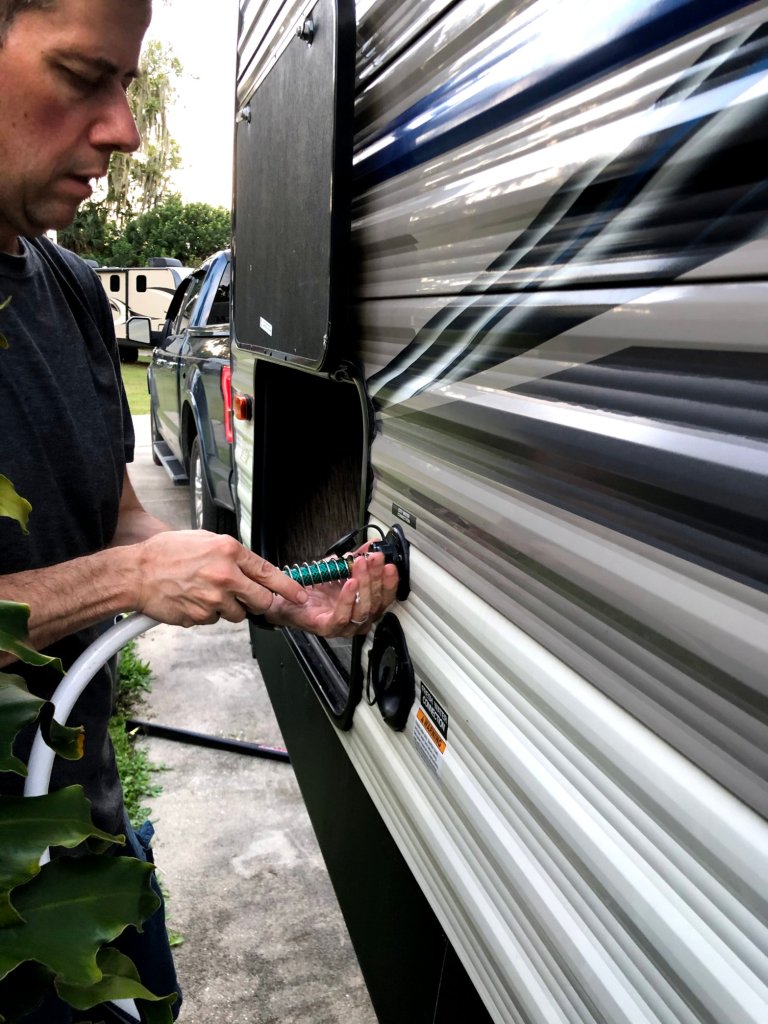
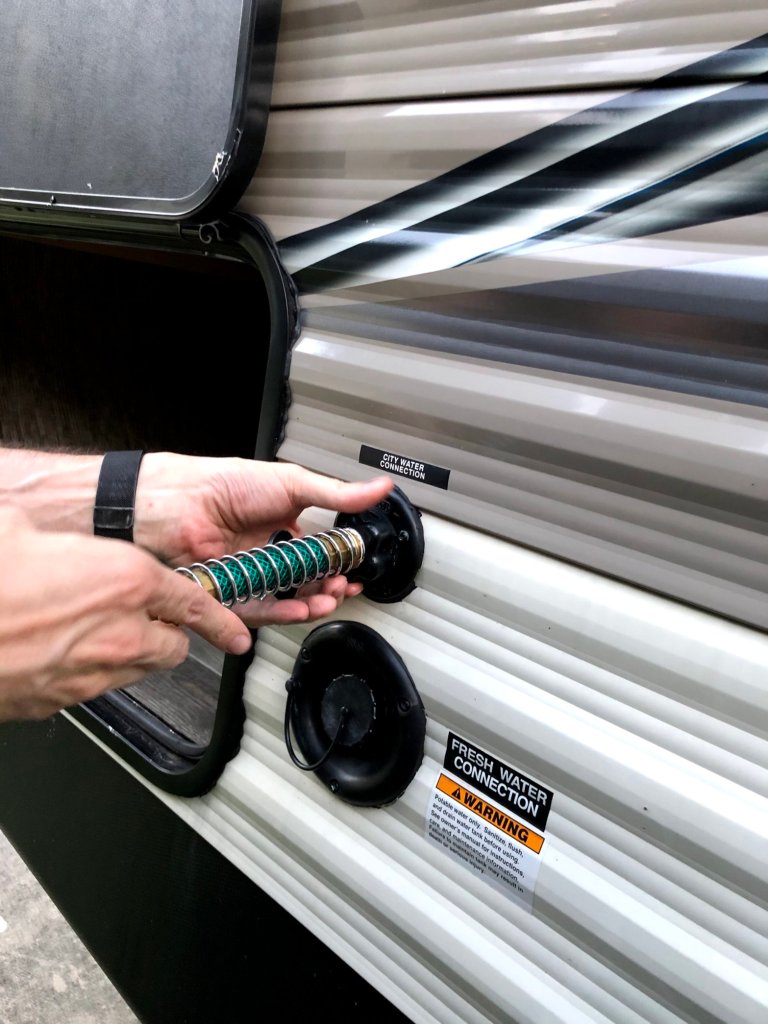
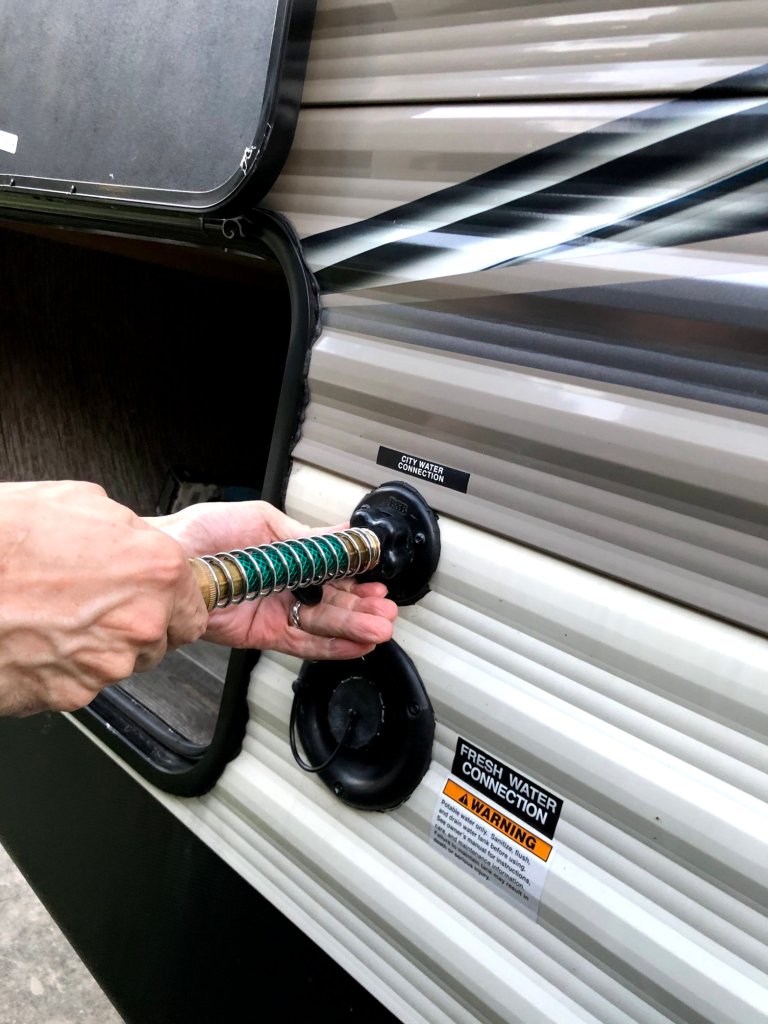
At the far end of the hose there is another set of threads that get, you guessed it, two wraps of Teflon tape. Now connect the far end of the hose to the second aformentioned strain relief, in this case a green one. That then gets connected to the “City Water” input on the side of the trailer. If you have a fresh water tank, the fill for the tank and the “City Water” input should be right next to or on top of each other. It should look something, but not exactly like this…
That should be the last connection. At this point dress the hose under the trailer and out of the way, return to the spigot and turn it all the way on. I usually stay there and watch the water pressure build up; then check all my connections for leaks before heading into the camper and burping the air out of all the faucets, toilets and showers.

Congratulations, you have power and fresh water and hopefully you haven’t connected the two together. Now if you have a site that has full hookups – we are on to Sewer.
See Also:
Tearing Down Camp (coming soon)
Setting Up Camp (Parking, Leveling & Disconnecting)
Discover more from Wandering with the Williams Family
Subscribe to get the latest posts sent to your email.


Great post! I haven’t ever hooked one up, but always wonder how it works
LikeLiked by 2 people